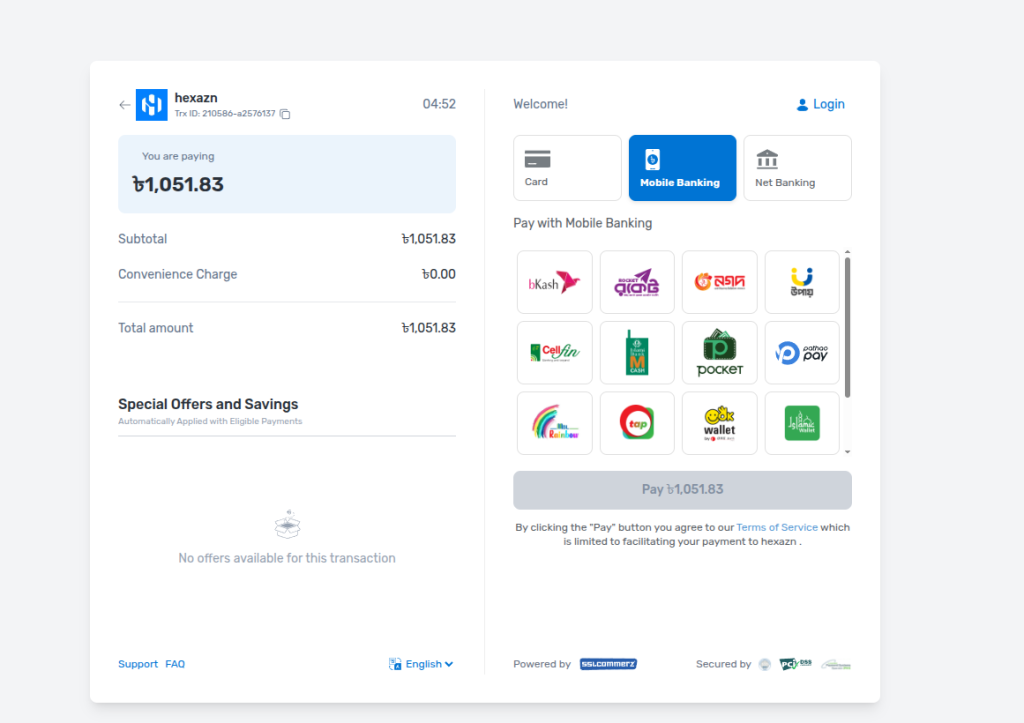
Step 1: Go to the Client Area
Visit the Hexazn website and click Client Area from the top-right corner.
This will take you to the Hexazn client login page.
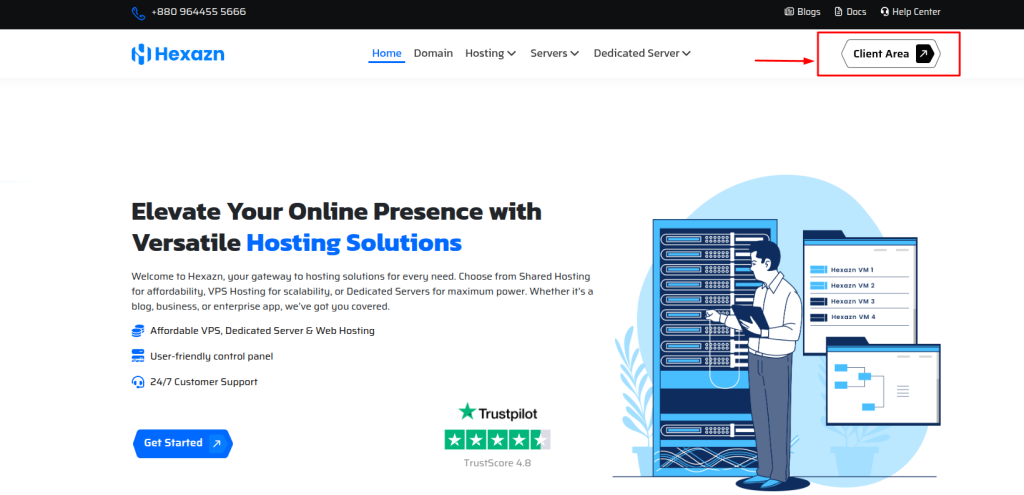
Step 2: Create Your Account
If you already have an account, simply log in.
If you are a new customer, you can:
- Click Create an Account, or
- Use Sign in with Google for a quicker registration process.
For this guide, we will use the Create an Account option.
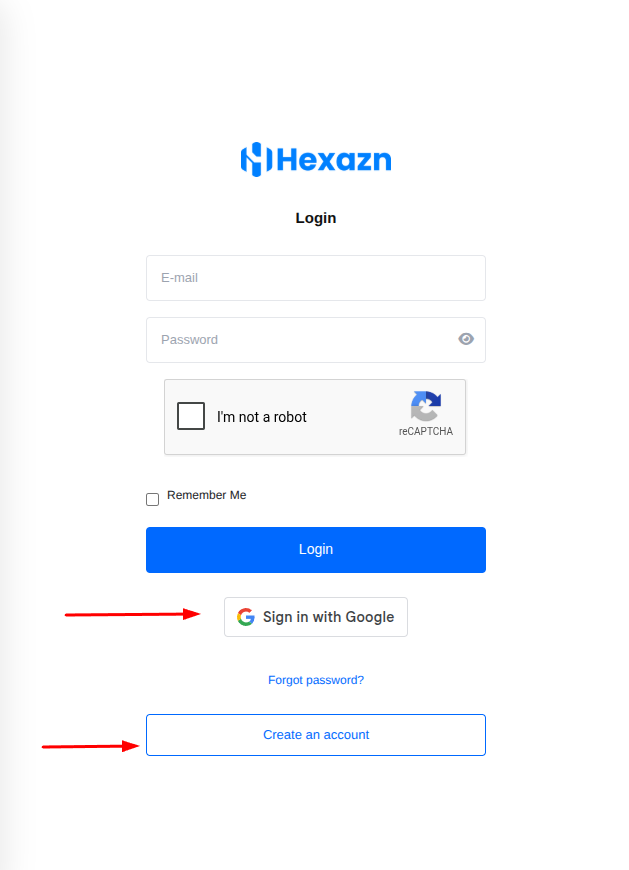
Step 3: Complete the Registration Form
Fill in the required information, including:
- First Name and Last Name
- Email Address
- Phone Number
- Billing Address
- City and Country
- Password and Confirm Password
You can also use Generate Password to create a strong password automatically.
After filling in the information:
- Complete the I’m not a robot verification.
- Agree to the Terms of Service.
- Click Register.
You can also use Sign in with Google if you prefer a faster signup process.
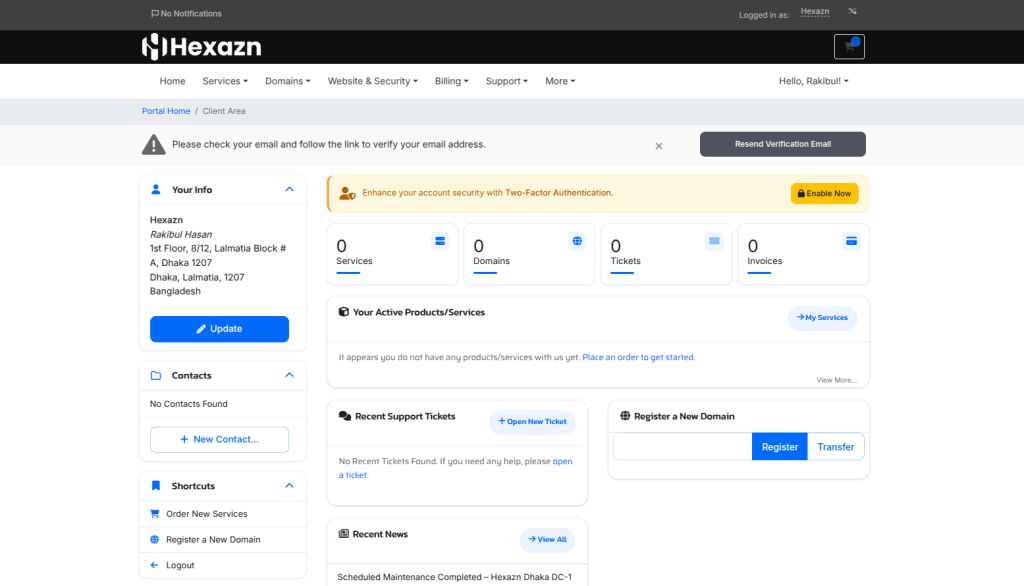
Step 4: Access Your Client Dashboard
After successful registration, you will be taken to your Hexazn Client Area Dashboard.
If you see an email verification notice, check your email inbox and click the verification link to verify your account.
From the dashboard, you can manage your:
- Hosting services
- Domains
- Invoices
- Support tickets
- Account information
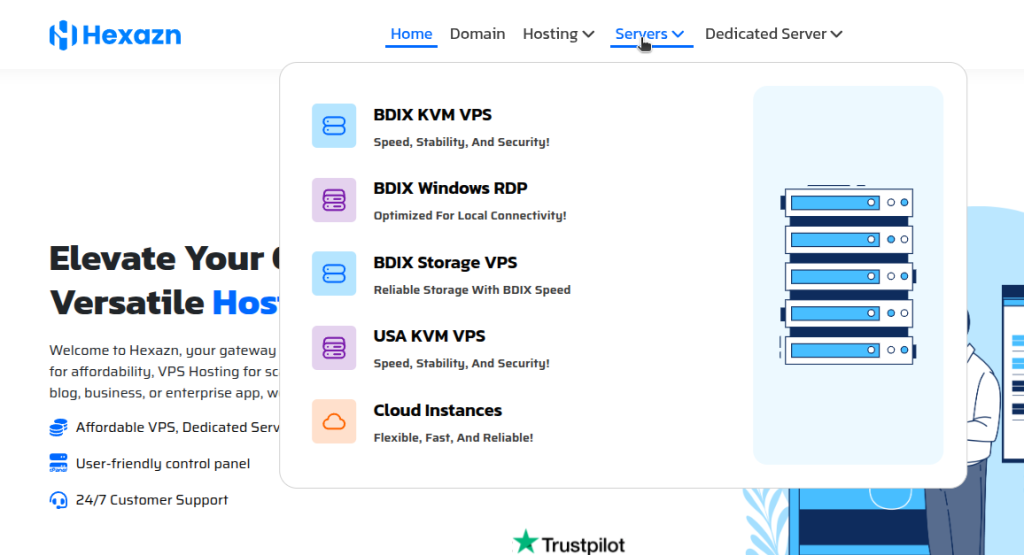
Step 5: Choose VPS
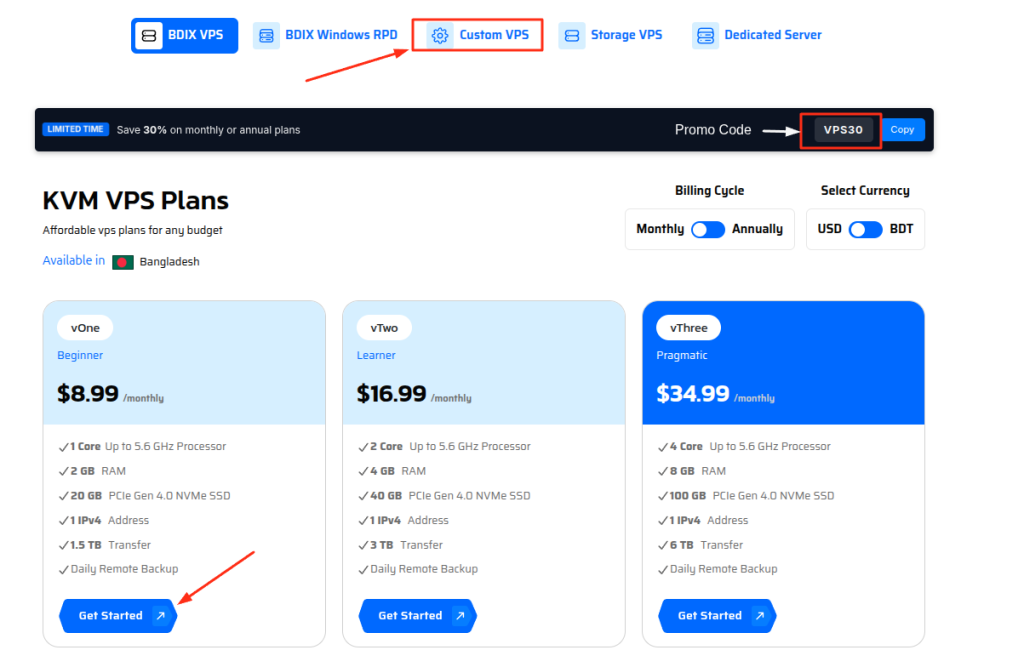
Step 6: Select Your VPS Plan
If you want a custom package, you can click Custom VPS.
You can also:
- Choose Monthly or Annually
- Select your preferred currency
- Use the promo code VPS30
After choosing your plan, click Get Started.
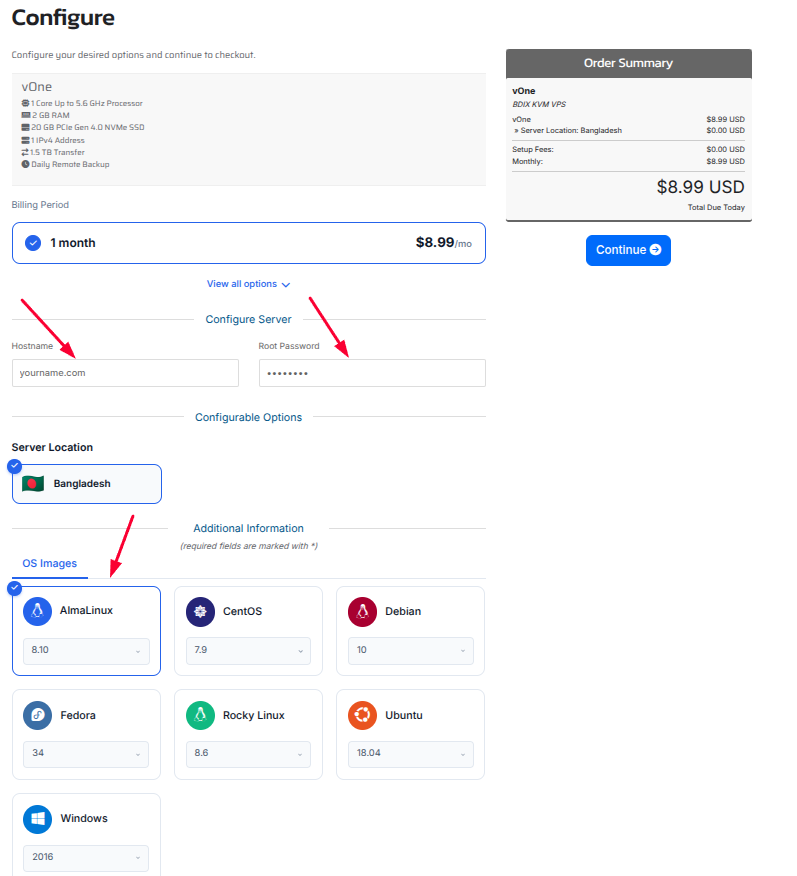
Step 7: Configure Your VPS
Now you need to configure your VPS.
Here you will need to:
- Choose the billing period
- Enter your hostname( your name or domain)
- Set a root password
- Select the server location
- Choose your operating system
Available OS options may include:
- AlmaLinux
- CentOS
- Debian
- Fedora
- Rocky Linux
- Ubuntu
- Windows
After filling in everything, check the Order Summary and click Continue.
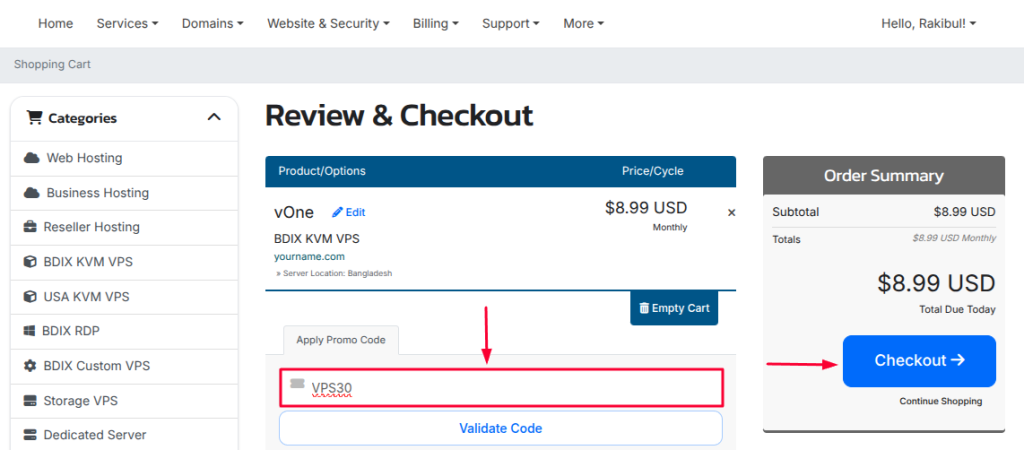
Step 8: Review and Checkout
Now you will see the Review & Checkout page.
Here you should:
- Check your selected VPS plan
- Enter the promo code VPS30
- Click Validate Code
- Review the final order summary
If everything looks correct, click Checkout.
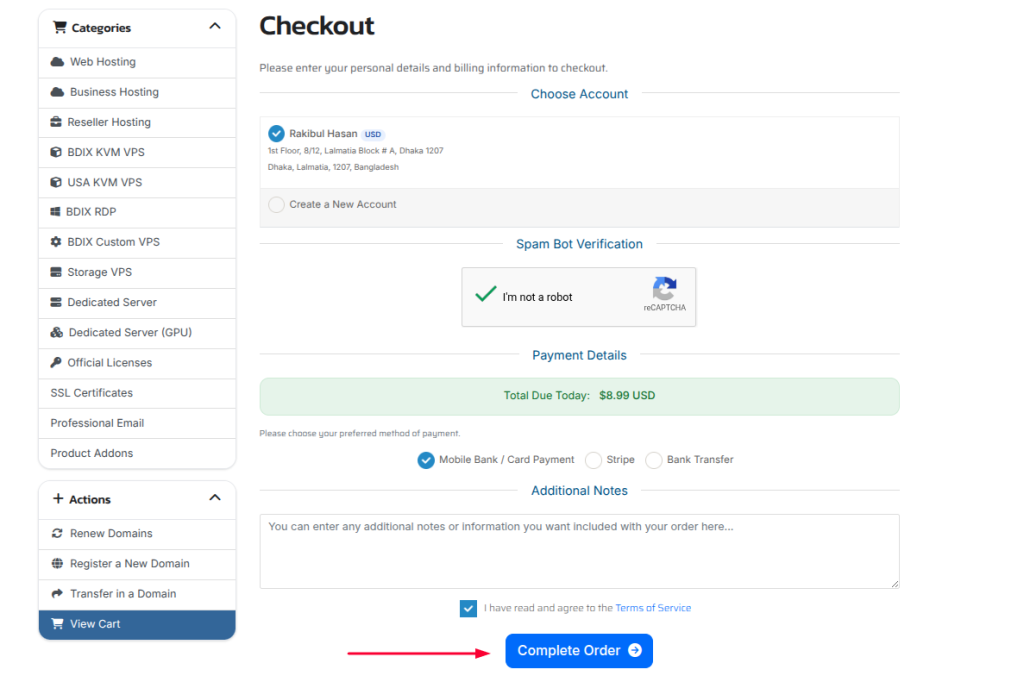
Step 9: Complete the Order
On the checkout page, enter your account and payment details.
You may need to:
- Choose your account or create a new one
- Complete the spam bot verification
- Select your payment method
- Add any extra notes if needed
- Agree to the Terms of Service
After that, click Complete Order.
Step 10: Pay the Invoice
After placing the order, you will see your invoice page.
To finish the order:
- Review the invoice details
- Click Pay Now
- Complete the payment using your preferred payment method
Once the payment is successful, your VPS order will be confirmed.
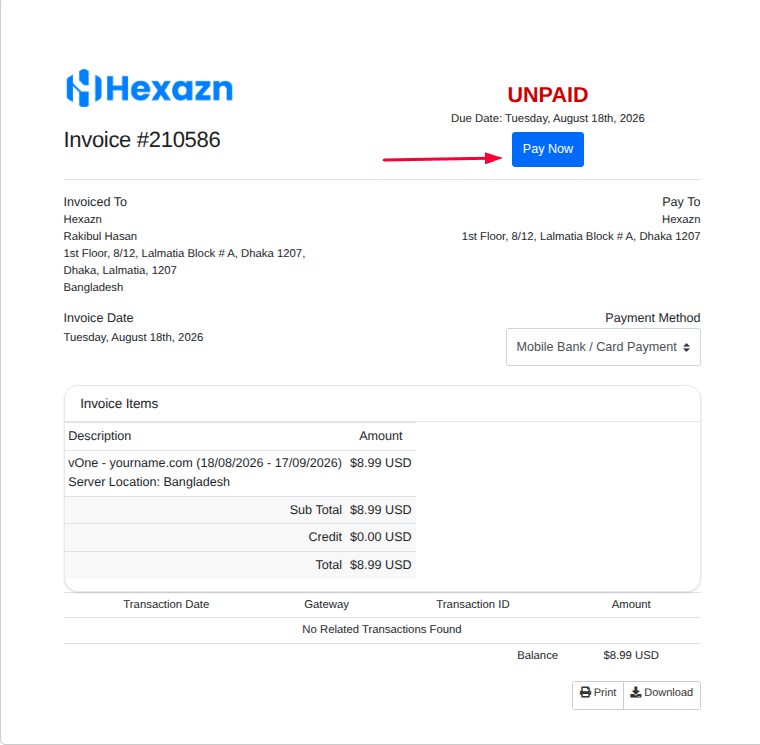
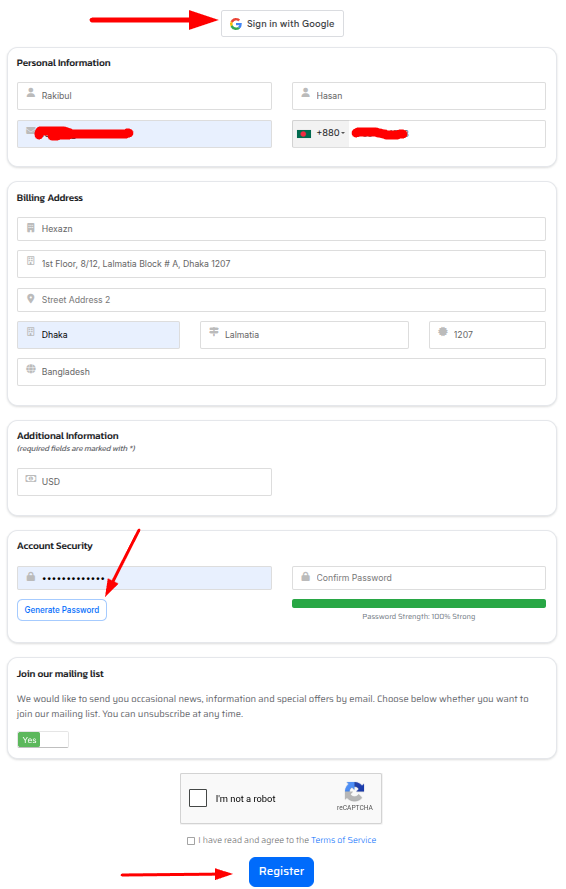
Payment page