
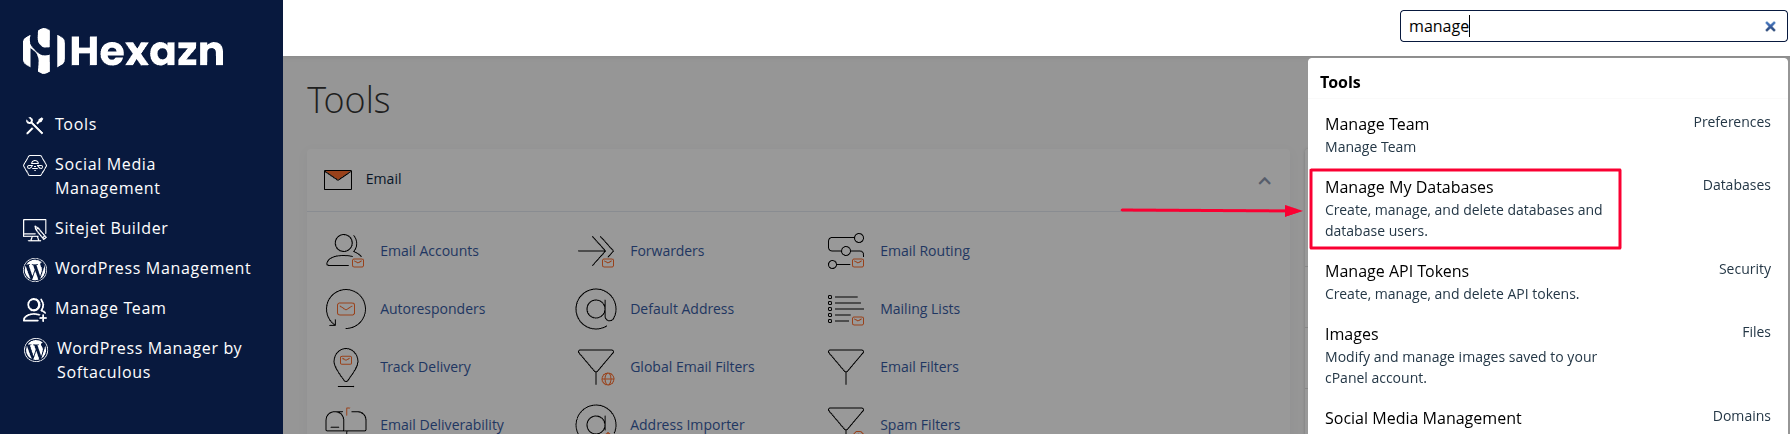
Step 1: Open Manage My Databases
- Log in to your cPanel account.
- Use the search bar at the top-right corner.
- Type Manage My Databases.
- Click Manage My Databases from the search results.
Step 2: Create a New Database
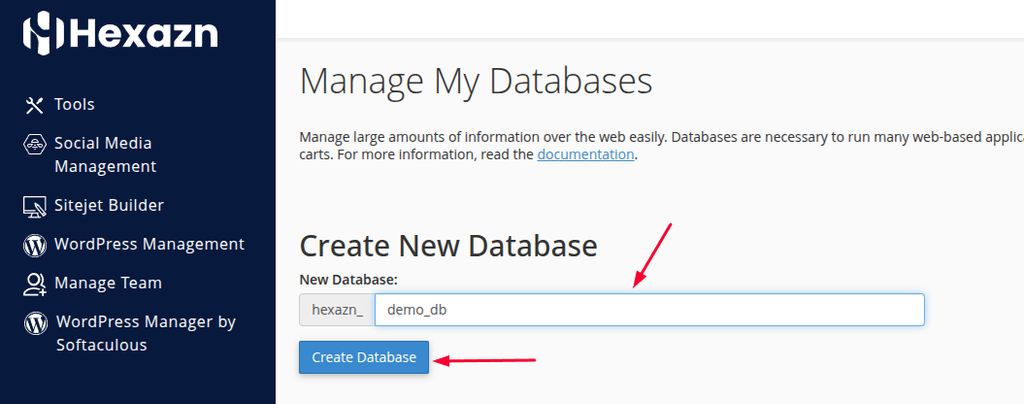
- Find the Create New Database section.
- Enter your preferred database name in the New Database field.
For example:
demo_db
- Click Create Database.
- Your new database will be created successfully.
Note: cPanel automatically adds your account username before the database name.
For example:hexazn_demo_db
Step 3: Create a Database User
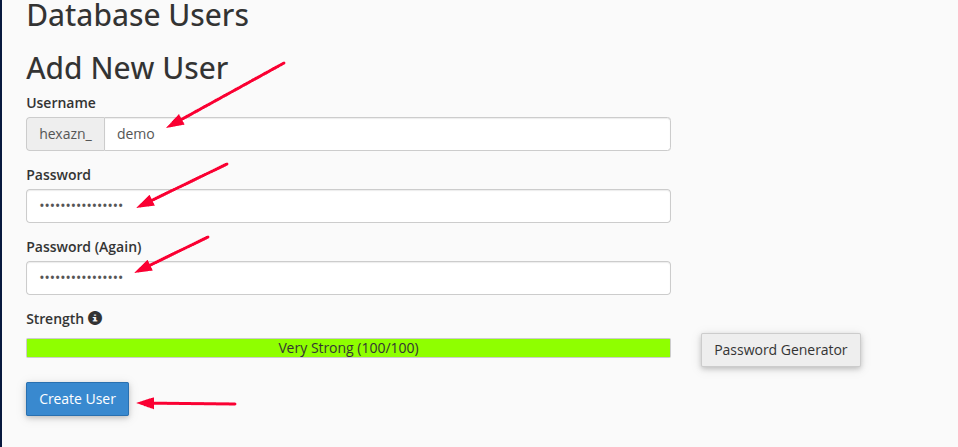
- Scroll down to the Database Users section.
- Under Add New User, enter a username.
For example:
demo
- Enter a strong password in the Password field.
- Enter the same password again in the Password (Again) field.
- You can also use Password Generator to create a strong password automatically.
- Click Create User.
Your new database user will now be created.
Note: cPanel may automatically add your account username before the database username.
For example:hexazn_demo
Step 4: Select the Database User
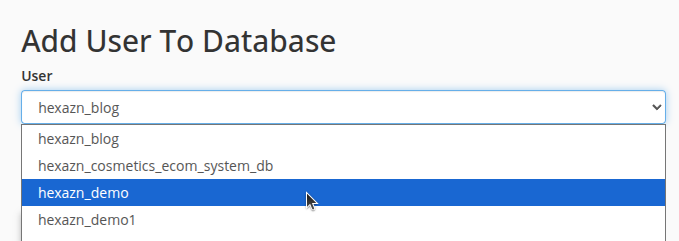
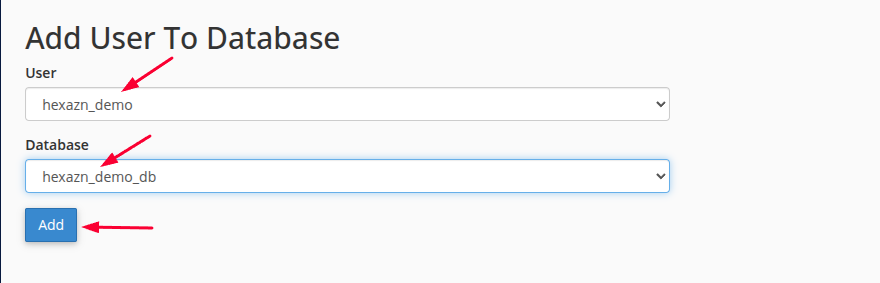
- Scroll down to the Add User To Database section.
- Open the User dropdown menu.
- Select the database user you created in the previous step.
For example:
hexazn_demo
Step 5: Add the User to the Database
- From the Database dropdown, select the database you created earlier.
For example:
hexazn_demo_db
- Make sure the correct User and Database are selected.
- Click Add.
The database user will now be connected to your database.
Step 6: Give the User All Privileges
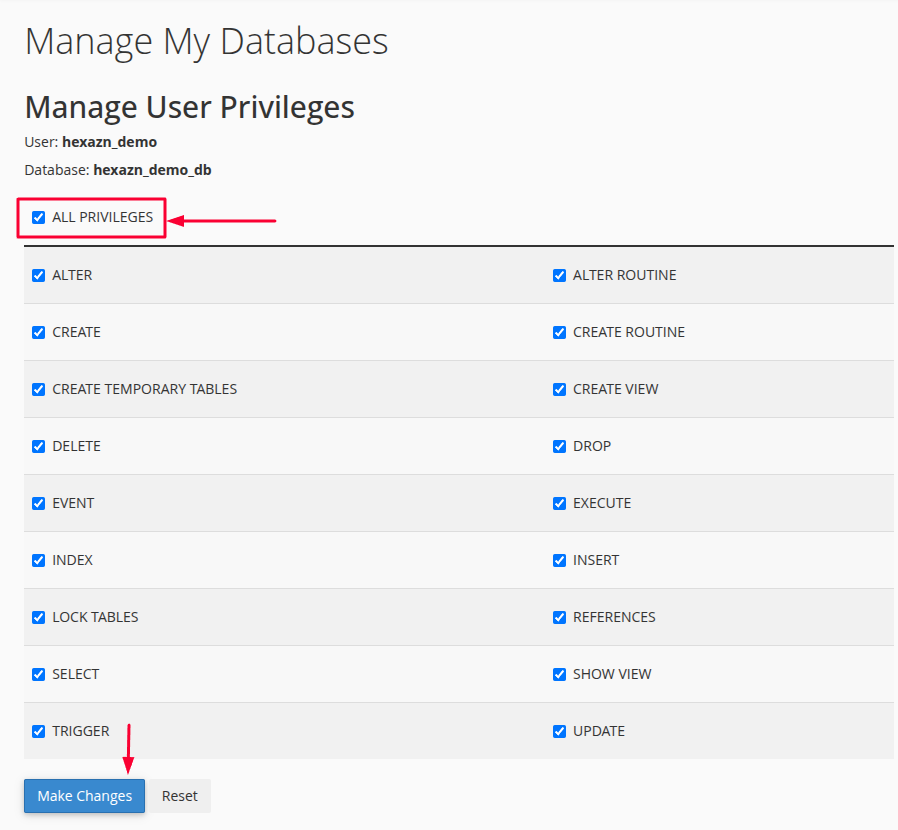
After clicking Add, you will see the Manage User Privileges page.
- Check the ALL PRIVILEGES option.
- This will automatically select all required database permissions.
- Scroll down and click Make Changes.
Your database user will now have permission to access and manage the database.
Done!
You have successfully:
- Created a MySQL database
- Created a database user
- Connected the user to the database
- Given the user all required privileges
Your database is now ready to use with WordPress, PHP applications, or other website software.

