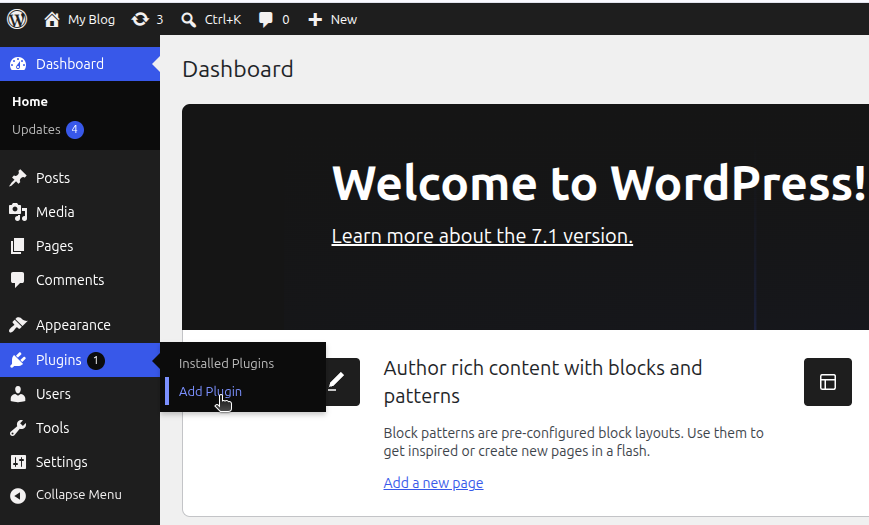
Step 1: Go to Plugins in WordPress
First, log in to your WordPress Dashboard.
From the left menu, go to:
Plugins → Add Plugin
This is where you can install new plugins for your website.
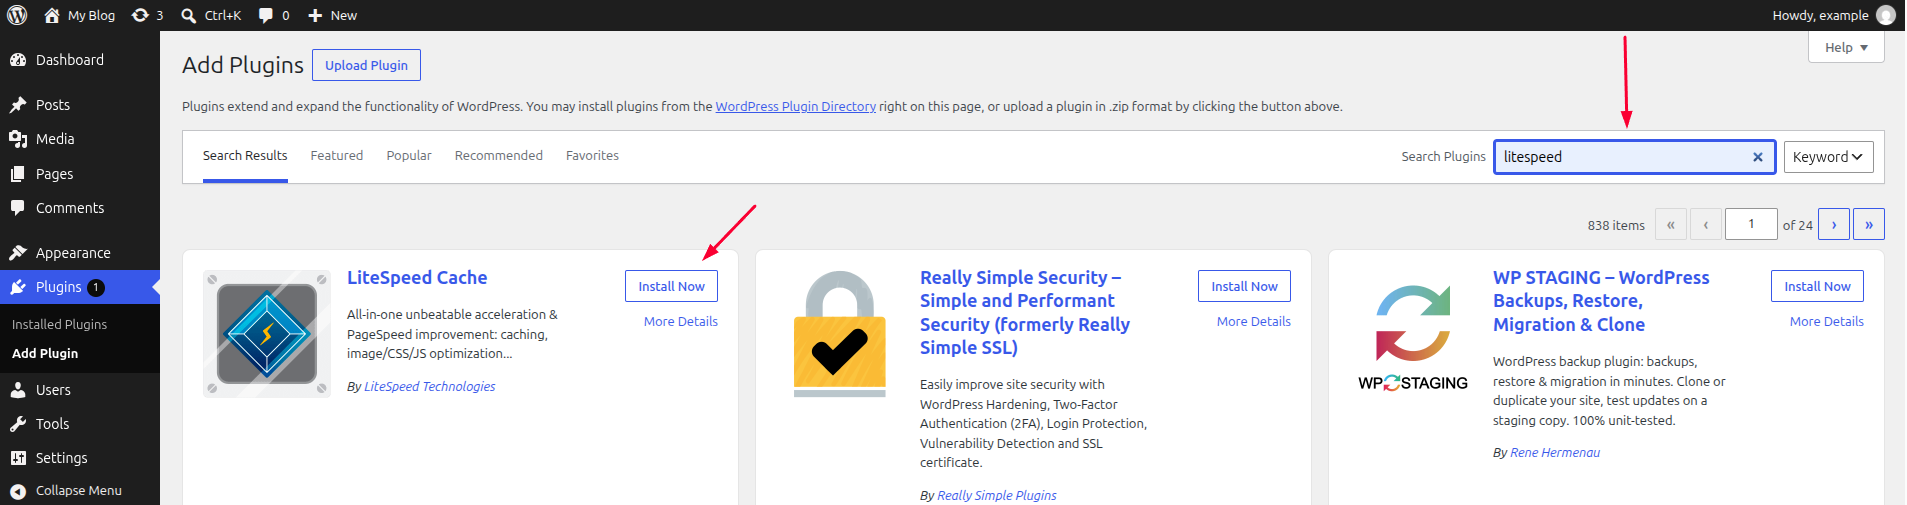
Step 2: Search for LiteSpeed Cache and Install It
In the search box, type:
LiteSpeed Cache
When you see the plugin, click:
Install Now
After the installation is complete, click:
Activate
Now the LiteSpeed Cache plugin is added to your WordPress site.
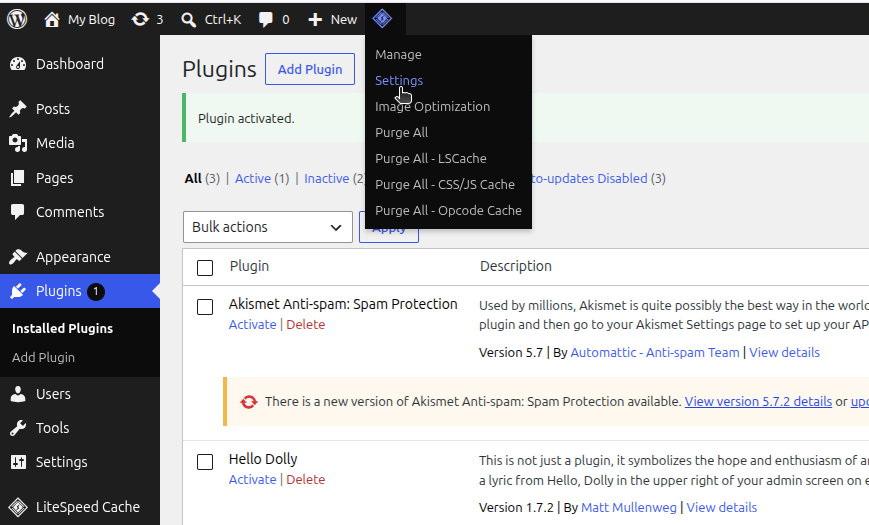
Step 3: Open LiteSpeed Cache Settings
After activating the plugin, you will see a new menu called:
LiteSpeed Cache
Click on it to open the settings page.
From here, you can manage cache and optimization options for your website.
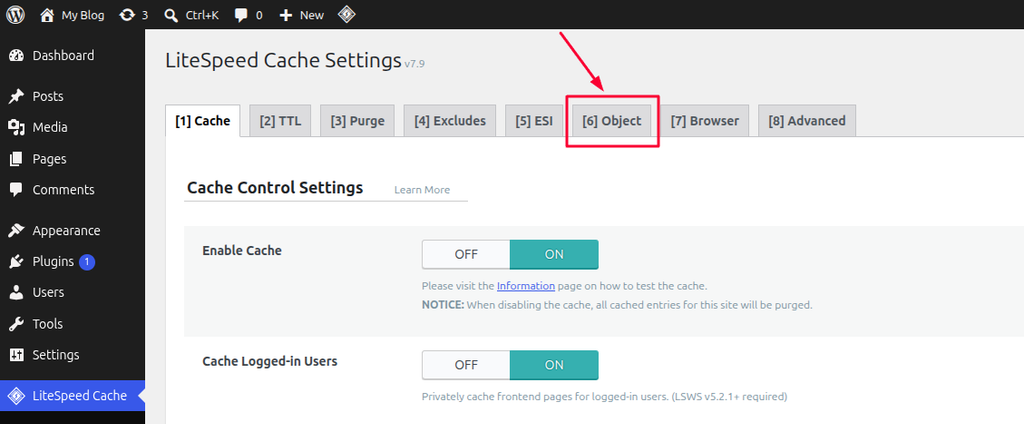
Step 4: Go to the Object Tab
Inside the LiteSpeed Cache settings page, you will see several tabs such as:
- Cache
- TTL
- Purge
- Excludes
- ESI
- Object
- Browser
- Advanced
Click on the:
Object tab
This section is used to enable Object Cache with Redis.
Step 5: Check the Object Cache Page
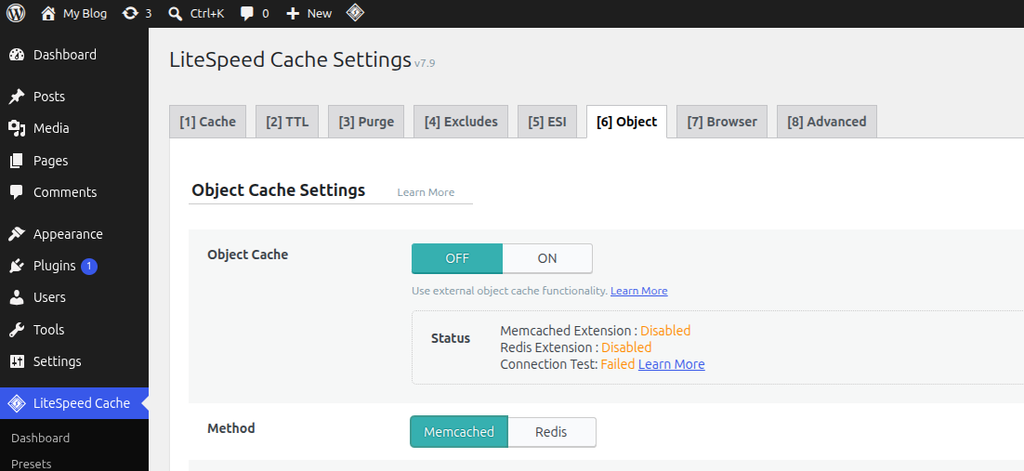
Now you will see the Object Cache Settings page.
Here you may notice that:
- Redis Extension is disabled
- Connection Test may fail
This is normal if Redis is not enabled yet in your hosting account.
So, the next step is to enable Redis from cPanel.
Step 6: Go to cPanel and Search for “Select PHP Version”
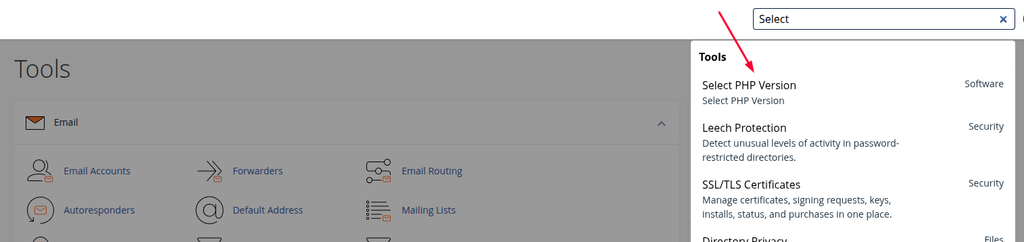
Now open your cPanel account.
In the search box, type:
Select PHP Version
Then click on it.
This page allows you to enable important PHP extensions for your website.
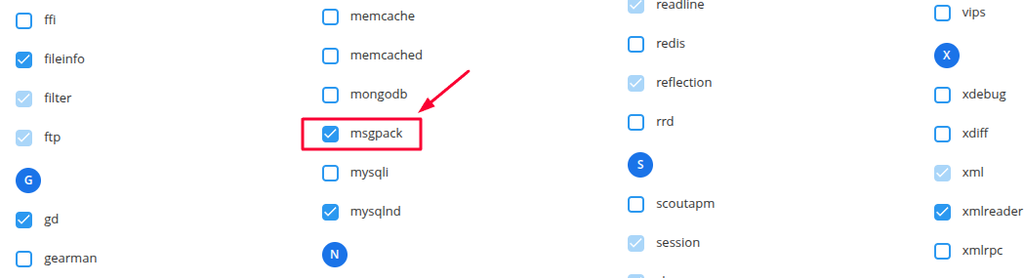
Step 7: Enable Required PHP Extensions
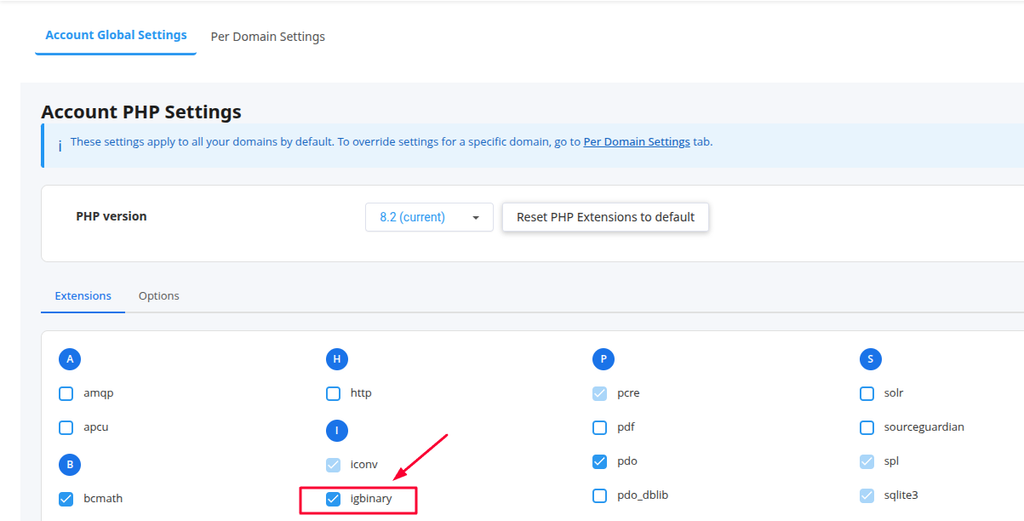
Inside Select PHP Version, go to the Extensions section.
Now enable these extensions:
- igbinary
- msgpack
- redis
Make sure these options are checked.
After that, save the changes if needed.
These extensions are required to use Redis properly with WordPress.

Step 8: Go Back to WordPress and Enable Redis
Now return to your WordPress Dashboard.
Go to:
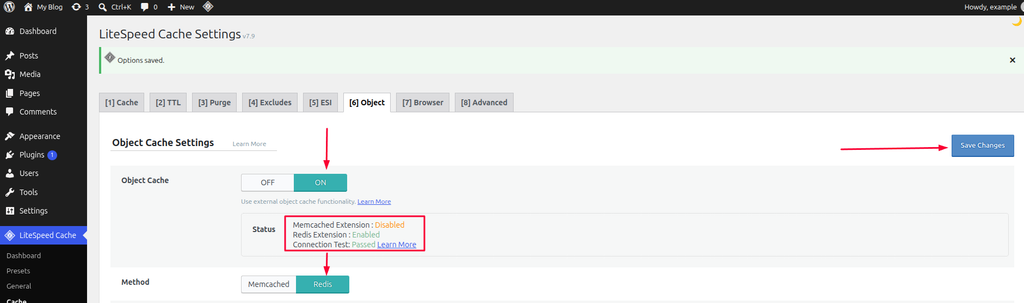
LiteSpeed Cache → Cache → Object
Then update the settings like this:
- Object Cache → ON
- Method → Redis
If everything is configured correctly, you should now see:
- Redis Extension: Enabled
- Connection Test: Passed
Finally, click:
Save Changes
Your Redis Object Cache is now enabled successfully.